Stencils became part of our everyday airbrush artistic work and many people are asking for some instructions on how to make a stencil. I’ve asked at many places “What final format would you prefer for a stencil” if you want to print it yourself on a printer or perhaps if you have access to a plotter, which is better option when it comes to cutting out the stencil and you can make stencil with much better details.
Most votes I got were for CorelDraw. That’s why I decided that it is time to make a tutorial on “How To Make a Stencil in CorelDraw“.
Why CorelDraw?
I was hoping more people will vote for Corel. Another option was Photoshop, but Photoshop is a bitmap editor and when it comes to cutting it on plotter that’s the worst option you can have. To make an ideal stencil you need a vector editor.
There is an option by Adobe called Illustrator that works with vectors and even Photoshop these days has some vector tools. But I’m not very familiar with this tools so let’s not complicate life. CorelDraw was the people’s choice and I’m going to show how it’s done.
The process
This particular tutorial is for creating of one layer stencil of a photograph
- Get rid of all the parts we don’t need
- Desaturate
- With toll “Brightness/Contrast” we achieve maximum contrast
- Fix all the details with paintbrush/eraser
- Repeat last two steps untill we get the result we want
This is the easy way to make a stencil. I will show you more advanced way. Well, if we want to make the stencil of a photo you need to use a bitmap editor first to prepare it for a vector editor. Which one you’re going to use, doesn’t matter as CorelPhotoPaint, Photoshop or maybe Gimp have similar tools (they just may be under different menu or called slightly different name). Even though I have said we need CorelDraw because it is a vector editor, most of the steps are done in bitmap editor.
BTW, if on your computer, pictures in this tutorial look blurred, click on them :)
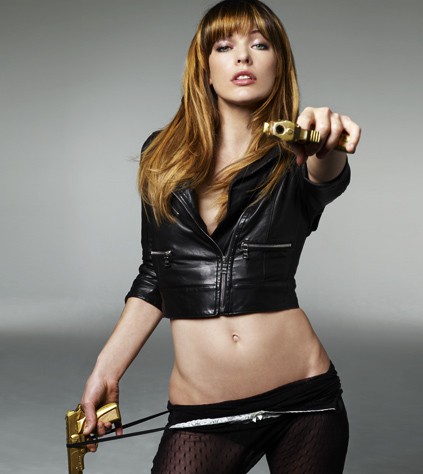
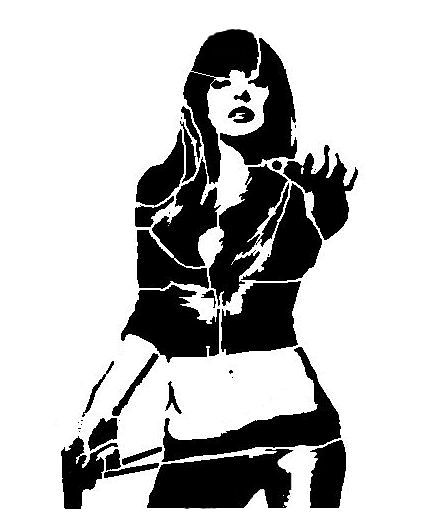
I’m going to stay with Corel for the process (Corel has bitmap editor too). As image I’m going to use a photo of Milla Jovovich (she is not just a good actress but good singer and fine model ;)).
Bitmap Editor
So open your image in CorelPhotoPaint and head to Menu > Adjust > Contrast Enhancement (Levels in older version). If our picture has low contrast and misses the Black and White, this will help us to set the colours in full range from black to white.
 Desaturation can be easy if you just use Desaturate tool but we can use something better that can help not just desaturate the photo but also raise some of colour levels.
So, we use Menu > Adjust > Chanel Mixer. Actually we need to set RGB the right way. For every picture it is going to be different depending on colorization. In this case I would say the red channel dominates. The green channel is not important at all and blue channel gives our picture a good contrast. Actually, if we don’t want to over expose the picture, the sum of channels has to be 100 (R30, G0, B70). But for our case exposure is good so we set R50, G0, R100 (sum of 150).
 Don’t forget to set these values for every “Output Channel“. If you make the right choice for the levels the output picture will be B&W.
Next step is needed if picture has different local lightness. To fix this we use tool “Local Equalization“. Do not be scared of stains and lower contrast (it is going to be fixed later). But first erase everything you don’t need (I used eraser tool)
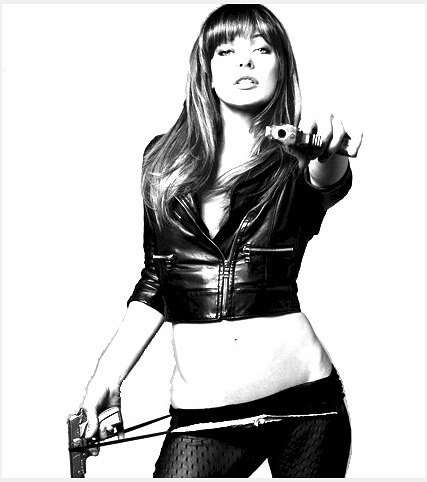
 And now we actually start making a stencil using a tool “Brightness/Contrast/Intensity“. Set contrast to max and try to play with brightness.
 If you have a wish to make edges a bit smoother use Menu > Effects > Blur > Gaussian Blur, and then repeat contrast procedure again and again untill you get really B&W picture.
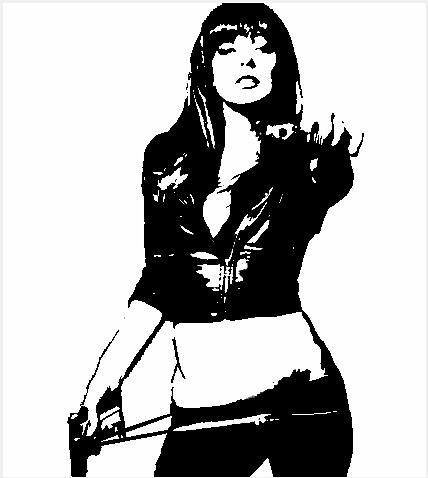 Here comes very important step. By using eraser or brush you have to break some lines and areas. In this particular case, if you need only the positive of the stencil, break all the black (after you cut the black out no whites will fall out as well). Here is my example where I’ve fixed a bit more but I think still not enough, so whites are still too thin and it could be difficult to cut it with your hands on the paper or even for vinyl when you cut it with the plotter (this is just a demonstration).
Actually if we don’t have a plotter there is no point to go any further, but if we have then open this image in CorelDraw. As you see I’m almost done and I didn’t even open a vector editor. Well, if you want a bigger stencil then it’s going to be better to convert it to vectors.
Vector Editor
When in CorelDraw, go to “File > New.” Then “File > Import”. When you have the picture imported and set for the size of the paper click right mouse button and choose “Outline Trace“. There are more options but it doesn’t matter which one you’ll choose as you will have to change the setting for details anyway.
Go with the setting on the picture. You can see that even with max zoom there is no squares typical for bitmaps. :)
 You may, if you want to tick the “delete original image” box, but you don’t have to. In tab colors, switch to B&W.
 Of course you don’t want to print it with that much black, so click on the image with right mouse button and select “Properties”. Here you can select the width of the lines (I chose 0.1mm) and the fill of the object (I chose white) so, the printer will print (or plotter will cut) the lines only.
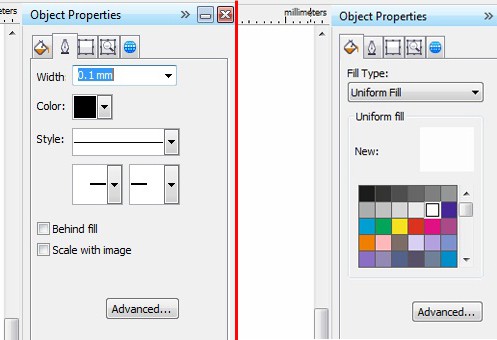
 After all, if you want to make your stencil larger, select the background and in left top corner change format from A4 to A1 (for example) and then just stretch your image to the size you want.

 This is it! the only thing when you’re going to print the big stencil on small A4 printer you have to adjust in File > Print some settings
 Now we’re done. I hope this tutorial will help you. I just want to point out that I am not a professional in CorelDraw so perhaps there are different ways on how to achieve the same results in this stencil tutorial but I hope that many of you will appreciate my effort I put in this by leaving a short comment.



Great Tutorial! I’ve been looking into trying out stencils lately, now that I am more confident with our plotter. What material do you use for the stencil?
If I’m going to use the stencil only once I use print paper, but if I want to use it every day I use vinyl
Hi i use gimp2 it’s the same as photoshop but free no charges at all bee using it for 6-7 months now
Hi David,
I am aware of Gimp and it is really great peace of software for free. But I don’t know how to create vector graphics in Gimp.
can you share your experience?
Hi, either you have a driver that you set as a printer in Windows, or you use the Gimp Export options ad export the drawing in a format that you can load in your Plotter program. Much of this Vector making, are about exporting and importing and not all programs open all exported files.
Basicly the problem are how “Vectors” are understood by the different programs. I am used to a Vector being a line with no width from point to point to point aso. But many of the profesional paint programs use “Vectors” in their own way to make a drawing smaller. — Long technical explanation, but if a color gradualy change into another in an area, then the programs use the borders for that in “Vectors” and then add a code that tell what colors start as and end as. We can’t use that.
There are cutter plotter drivers for CorelDraw, but there are so many misunderstandings about what plotters can, — many don’t know the difference between a Plotter and a Printer. I use the ArtCUT program that came with my plotter, not to draw in but for importing DXF files I made in AutoCAD as Line drawings, as ArtCUT are the perfect program to run a cutter plotter, it even expand the work area automatic and tell what sizes you need to feed into the plotter, and then it calculate the individual plots so you can stitch several sheets into one, if you need a huge Stencil. — Btw. do not use paper in a Vinyl plotter, it will blond your knive very fast.